
Medical Equipment Acceptance Testing: What Happens Before Final Handover
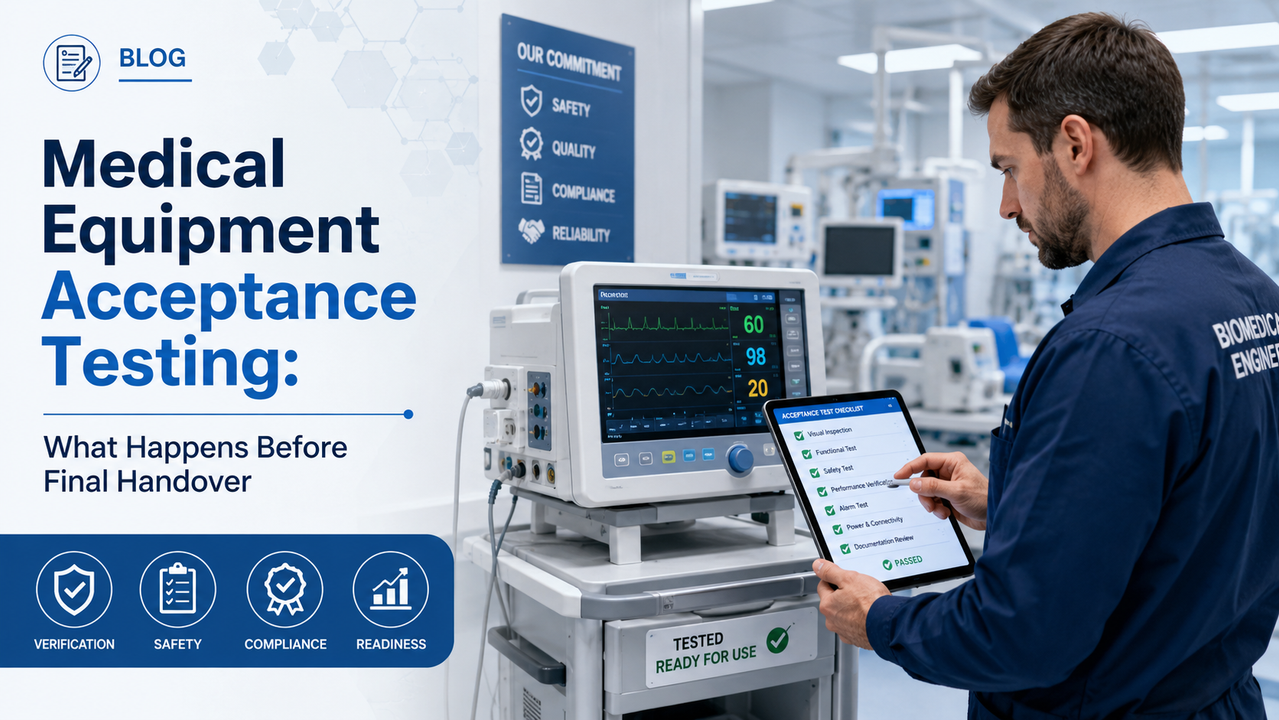
Purchasing medical equipment is only one part of bringing a new device or system into a healthcare facility. Before equipment is placed into routine clinical use, hospitals, clinics, laboratories, and government healthcare organizations typically need to verify that what arrived is what was ordered—and that it performs as expected.
That verification process is commonly referred to as acceptance testing.
Medical equipment acceptance testing helps confirm that equipment has been delivered in the correct configuration, installed appropriately, documented correctly, and evaluated against applicable purchasing requirements before final handover to the customer.
For complex equipment, acceptance testing may involve biomedical engineering, clinical engineering, facilities personnel, information technology teams, infection-prevention staff, end users, procurement representatives, manufacturers, distributors, and installation contractors.
Done correctly, acceptance testing creates a clear transition between delivery and operational ownership.
What Is Medical Equipment Acceptance Testing?
Medical equipment acceptance testing is the structured inspection, verification, and documentation process performed before a healthcare organization formally accepts newly delivered equipment.
The exact procedure depends on the type of equipment, the facility's policies, the purchase contract, and the intended application.
A portable patient monitor, for example, may require a different acceptance process than a mobile digital radiography system, automated storage cabinet, laboratory analyzer, or integrated clinical workstation.
At a high level, acceptance testing answers several fundamental questions:
- Was the correct product delivered?
- Does the configuration match the purchase order and approved specifications?
- Was the equipment damaged during transportation?
- Are all accessories, components, manuals, and software included?
- Has the equipment been installed correctly?
- Does the system power on and function properly?
- Do important safety and performance checks pass?
- Are interfaces and network functions operating as intended?
- Has required user training been completed?
- Is documentation sufficient for the facility to take ownership?
Acceptance is therefore much broader than simply confirming that a shipment arrived.
Step 1: Verify the Equipment Against the Purchase Order
The first stage is usually a physical and documentary comparison between the delivered equipment and the purchasing documents.
Teams may verify:
- Manufacturer
- Model number
- Catalog or part number
- Serial number
- Quantity
- Accessories
- Options
- Software packages
- Firmware version
- Installed modules
- Power configuration
- Mounting hardware
- Consumables or starter kits
- User manuals
- Service documentation
For government and institutional procurements, this step may also include verification against contract line items, technical schedules, statements of work, or approved equivalency documentation.
A device that is technically functional may still fail acceptance if it is not the configuration that was actually ordered.
Step 2: Inspect for Shipping Damage
Medical equipment can travel thousands of miles before reaching its final destination.
Even when packaging appears intact, receiving personnel should examine equipment for signs of transportation damage.
Typical checks include:
- Cracked housings
- Bent panels or frames
- Loose components
- Damaged casters
- Broken displays
- Dented cabinets
- Fluid leakage
- Connector damage
- Missing protective covers
- Moisture exposure
- Packaging damage suggesting impact
Any suspected damage should be documented before installation proceeds.
Photographs, freight documentation, packing lists, serial numbers, and receiving records can become important if a freight claim or replacement request becomes necessary.
Step 3: Confirm the Installation Environment
Many medical systems have specific environmental and infrastructure requirements.
Before final commissioning, the installation team may verify that the location satisfies requirements for:
- Electrical supply
- Circuit capacity
- Grounding
- Temperature
- Relative humidity
- Ventilation
- Clearances
- Floor loading
- Wall reinforcement
- Water supply
- Drainage
- Medical gases
- Network connectivity
- Ceiling height
- Exhaust requirements
- Electromagnetic environment
This becomes particularly important for larger systems such as imaging equipment, sterilization systems, laboratory analyzers, medication cabinets, controlled-environment storage systems, and other permanently installed equipment.
An otherwise compliant device may perform poorly if the installation environment does not meet the manufacturer's requirements.
Step 4: Perform Electrical and Basic Safety Checks
Biomedical or clinical engineering departments frequently conduct safety inspections before equipment is released for clinical service.
Depending on the device and facility, testing may include evaluation of:
- Protective earth continuity
- Leakage current
- Power cords
- Plugs
- Fuses
- Batteries
- Emergency shutoffs
- Mechanical stability
- Covers and guards
- Alarm systems
- Electrical isolation
- Accessory connections
The applicable testing procedures vary by equipment category and healthcare organization.
The objective is straightforward: identify obvious electrical, mechanical, or operational hazards before staff or patients depend on the equipment.
Step 5: Verify Functional Performance
Once basic safety checks are complete, the equipment is typically operated through its major functions.
Functional testing may include:
- Startup and shutdown
- Display operation
- Buttons and controls
- Touchscreen response
- Battery charging
- Sensors
- Alarms
- Pumps
- Motors
- Doors and locks
- Temperature controls
- Humidity controls
- Internal lighting
- Data output
- Communications
- Printing
- Barcode or RFID functionality
For measurement devices, known simulators, reference standards, test instruments, or manufacturer procedures may be used to confirm that displayed measurements fall within expected tolerances.
The purpose is not simply to determine whether the equipment turns on.
Acceptance teams need confidence that the essential functions required by the procurement are actually available and working.
Step 6: Verify Alarms and Safety Functions
Alarm performance deserves specific attention because alarms frequently represent a critical layer of protection.
Acceptance testing may confirm:
- Audible alarms
- Visual alarms
- Alarm thresholds
- Door-open alerts
- Temperature excursions
- Power-loss alerts
- Battery warnings
- Connectivity-loss alarms
- Sensor failures
- System fault notifications
For connected equipment, teams may also verify whether alarms are properly transmitted to remote monitoring systems where such integration is part of the approved configuration.
Step 7: Test Network and System Integration
Modern medical equipment increasingly operates as part of a larger digital ecosystem.
Devices may connect with:
- Electronic health records
- Laboratory information systems
- Picture archiving and communication systems
- Pharmacy systems
- Inventory platforms
- Asset management systems
- Remote monitoring platforms
- Hospital networks
- Cloud services
Acceptance testing may therefore involve both the device and the interfaces surrounding it.
Teams may verify:
- Ethernet or Wi-Fi connectivity
- IP configuration
- User authentication
- Data transmission
- Time synchronization
- Device identification
- Interface mappings
- Remote access controls
- Software permissions
- Cybersecurity settings
When HL7, FHIR, DICOM, APIs, or proprietary interfaces are involved, interoperability testing may be conducted before clinical deployment.
Step 8: Check Accessories and Consumables
An overlooked but important part of acceptance testing is confirming that supporting materials are present.
Depending on the equipment, this can include:
- Sensors
- Patient cables
- Power adapters
- Batteries
- Mounting kits
- Shelves
- Bins
- Keys
- RFID tags
- Test fixtures
- Calibration accessories
- Starter consumables
- Tubing
- Filters
- Printer paper
- Cleaning accessories
Equipment may be technically functional but operationally unusable if critical accessories are missing.
Step 9: Verify Documentation
Proper documentation is a key part of equipment acceptance.
The receiving organization may need some combination of:
- Packing list
- Purchase order
- Commercial invoice
- Serial-number record
- Installation documentation
- Operator manual
- Service manual
- Warranty documentation
- Preventive-maintenance instructions
- Calibration records
- Inspection certificates
- Training records
- Regulatory documentation
- Software information
- Network configuration records
For institutional procurements, documentation requirements should ideally be established before shipment rather than discovered during installation.
Step 10: Establish Asset Identification and Service Records
Before equipment is placed into service, many healthcare organizations register it in an asset-management or computerized maintenance management system.
Records may include:
- Equipment control number
- Serial number
- Manufacturer
- Model
- Department
- Physical location
- Acquisition date
- Warranty expiration
- Preventive-maintenance interval
- Service provider
- Risk classification
- Network status
Government customers may have additional asset-identification requirements.
Creating these records during acceptance helps ensure that equipment does not disappear into clinical operations without being incorporated into maintenance and inventory systems.
Step 11: Conduct User Training
Successful equipment deployment depends on more than technical installation.
Clinical and operational personnel need to understand how to use the equipment correctly.
Training may cover:
- Startup
- Normal operation
- User controls
- Alarm response
- Cleaning procedures
- Shutdown
- Basic troubleshooting
- Consumable replacement
- Emergency procedures
- Data entry
- Network functions
- Daily inspections
For more sophisticated devices, biomedical engineering or technical staff may receive separate service-level instruction.
Training attendance should often be documented as part of the handover package.
Step 12: Complete Installation Qualification and Commissioning Where Appropriate
Certain equipment deployments require more formal commissioning.
Depending on the device and application, this may include activities commonly described as:
Installation Qualification (IQ): verifying that the equipment was installed according to approved specifications and manufacturer requirements.
Operational Qualification (OQ): verifying that the system operates correctly throughout its defined operating parameters.
Performance Qualification (PQ): demonstrating that the equipment performs appropriately under actual or representative operating conditions.
Not every medical device requires a formal IQ/OQ/PQ program, but the underlying principle is valuable: installation, operation, and real-world performance are separate questions.
Step 13: Document Deficiencies Before Acceptance
Acceptance testing occasionally identifies problems.
These may include:
- Missing accessories
- Cosmetic damage
- Incorrect configuration
- Software errors
- Calibration concerns
- Network failures
- Installation deficiencies
- Incomplete training
- Missing documentation
- Performance outside specification
Rather than allowing these issues to remain informal, they should be documented on a deficiency or punch list.
Each item can then be assigned:
- Description
- Responsible party
- Required corrective action
- Target resolution
- Completion status
This creates accountability and prevents unresolved issues from becoming permanent operational problems.
Step 14: Final Acceptance and Handover
Once required inspections, corrective actions, testing, documentation, and training are complete, the authorized customer representative can approve final acceptance.
A typical final handover package may contain:
- Delivery confirmation
- Equipment inventory
- Serial numbers
- Installation report
- Acceptance-test results
- Training record
- Warranty information
- Service contacts
- Inspection reports
- Open-item confirmation
- Acceptance signature
At that point, responsibility transitions from delivery and installation into routine clinical ownership, maintenance, and lifecycle management.
Factory Acceptance Testing vs. Site Acceptance Testing
For complex or custom equipment, acceptance may begin before the product ever leaves the manufacturer.
Factory Acceptance Testing
A Factory Acceptance Test, or FAT, is conducted at the manufacturer's facility before shipment.
It can be used to verify:
- Configuration
- Dimensions
- Major functionality
- Controls
- Software
- Accessories
- Construction quality
- Custom requirements
Resolving problems at the factory can be considerably easier than discovering them after international transportation and installation.
Site Acceptance Testing
A Site Acceptance Test, or SAT, takes place after equipment reaches its final operating environment.
The SAT confirms that the equipment still performs correctly after transportation, installation, connection to utilities, and integration with the customer's infrastructure.
For complex procurements, using both FAT and SAT can significantly reduce deployment risk.
Why Acceptance Testing Matters
Acceptance testing protects everyone involved in the transaction.
For the healthcare provider, it creates confidence that purchased equipment is ready for operation.
For procurement teams, it demonstrates that contractual requirements have been evaluated.
For biomedical engineering, it establishes the equipment's starting condition and maintenance record.
For the manufacturer and supplier, it creates a documented conclusion to the delivery and installation process.
Most importantly, it reduces the likelihood that unresolved technical problems will first become apparent during clinical use.
Acceptance Testing Should Begin During Procurement
One of the most effective ways to improve acceptance testing is to define the requirements before the purchase order is issued.
A good procurement package can specify:
- Required configuration
- Performance parameters
- Required accessories
- Installation responsibilities
- Environmental requirements
- Training requirements
- Documentation requirements
- Inspection criteria
- Integration requirements
- Acceptance procedures
- Responsibility for corrective actions
This turns acceptance from an improvised receiving activity into a planned stage of the procurement lifecycle.
The Truway Health Perspective
At Truway Health, medical equipment procurement is viewed as an end-to-end process.
A successful equipment deployment does not end when a crate arrives at the loading dock. It continues through receiving, inspection, installation, testing, integration, documentation, training, and final handover.
Whether the project involves patient monitoring, sterile storage, RFID inventory technology, diagnostic equipment, laboratory systems, wound-care infrastructure, or other clinical technologies, clearly defined acceptance criteria can reduce uncertainty for both buyers and suppliers.
Healthcare organizations are increasingly purchasing interconnected systems rather than isolated devices. As that complexity grows, structured equipment acceptance and commissioning will become even more important.
The objective is simple:
The equipment delivered should be the equipment ordered, installed as intended, tested against defined requirements, documented properly, and ready to support the healthcare environment before final handover occurs.
Truway Health, Inc. supports healthcare organizations with medical equipment sourcing, procurement coordination, technical product evaluation, supply-chain planning, and clinical technology solutions. Product specifications, regulatory requirements, installation requirements, and acceptance procedures vary by device and facility and should be evaluated for each procurement.
Truway Health News & Insights

The Guidewire Is Not a Commodity: The Hidden Safety Architecture of Coronary Care
How precision engineering, clinical intelligence, and medical-device traceability are redefining exp...

Truth Social Suspends @truwayhealth Without Explanation: Truway Health Challenges Digital Censorship and Demands Accountability
October 9, 2026 | Truway Health News & Insights NEW YORK, NY — Truway Health, Inc. is formally chall...

The Stethoscope Standard: Rethinking the Value of U.S. M1 Through Medical Productive Capacity
Money ultimately derives much of its usefulness from confidence: confidence that a dollar can be exc...

Simple Steps for Seniors to Embrace Healthy and Joyful Living
For seniors seeking holistic wellness, healthy aging can feel harder than it should: the body change...

Healthcare Procurement Readiness: Building a More Resilient Clinical Supply Chain
Healthcare supply chains are often judged by a simple question: Did the product arrive? But for hosp...

Pass-Through Chambers and Material Flow in Controlled Healthcare Environments
Controlled healthcare environments depend on more than clean surfaces and filtered air. The way mate...